June 06, 2021
Creating 3D vintage topo maps in ArcGIS Pro - lessons learnt
New cartography knowledge learnt in this map making journey
1117 words | 5-min read |
I finally squeezed out some time slots to try making those pseudo 3D vintage map. Originally, I thought you need to have to master Blender to make those maps in order to create hose realistic shadows and casted lights. Out of my surprise (aka little did I know the power of ArcGIS Pro), John Nelson published a video walkthrough of creating these 3D vintage topo map from scratch. The video tab stayed in my Chrome for weeks until I can follow the walkthrough.
It may be also a good time to write down what I have learnt in this map making project.
Choosing vintage map of Hong Kong
Choosing a nice vintage map may be the most troublesome task for this project. I searched for Gwulo (a website dedicated for storing old images and photos of Hong Kong) and Hong Kong Historic Maps but could not find some nice high-resolution maps. More importantly, those maps could have a copyright license that I could not use it freely.
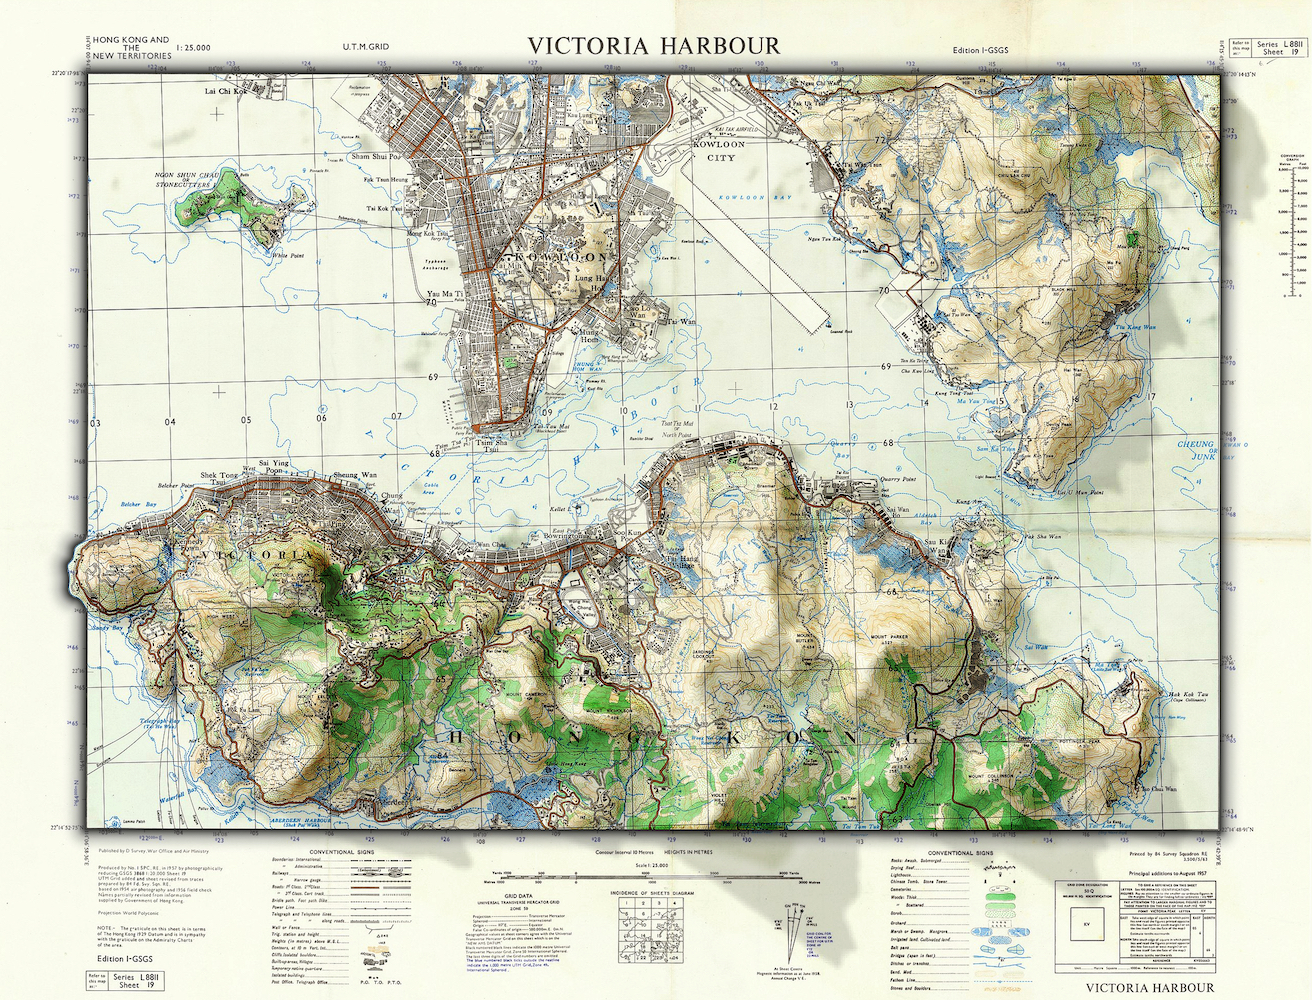
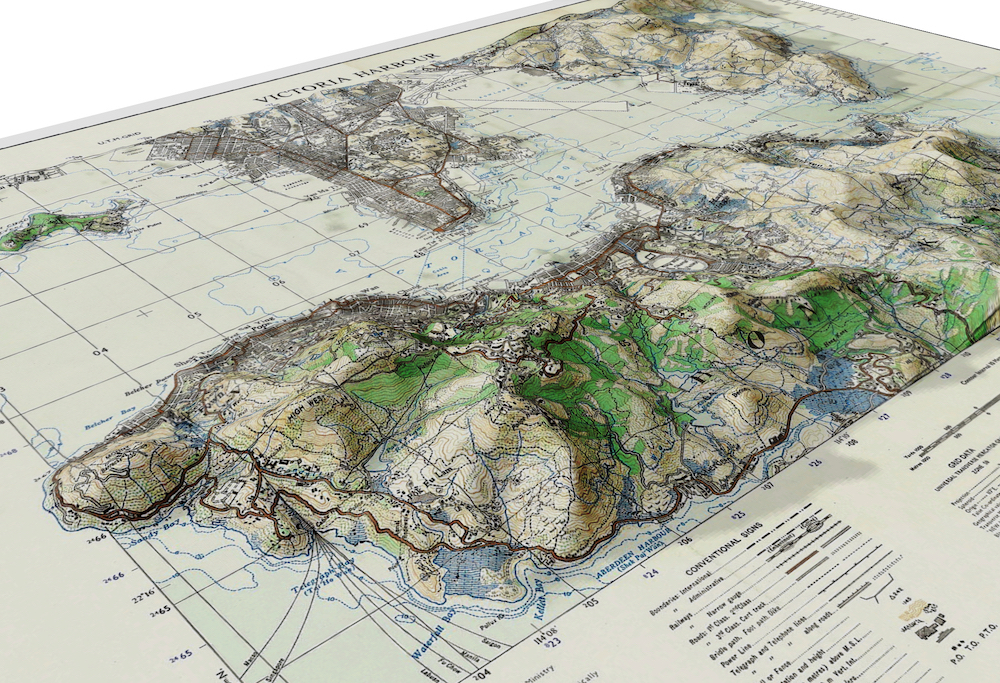
I then go to Wikimedia Commons, and luckily they have a category of images for old maps in Hong Kong that are free for public use. I chose this 1957 map of Victoria Harbour by the British War Office as the elements of this vintage map is similar to the one John Nelson used in his tutorial: 1. lon/lat graticules; 2. a little bit the map extruded outside the neatline (that little portion of Mount Davis on the left) and 3. a similar map layout.

Export Raster with Clipping Geometry vs. Clip Raster
I did not know the differences between exporting a raster with extent defined and the Clip Raster function available in the geoprocessing toolbox. Now I know their differences.
Export Raster with Clipping Geometry: export a minimum rectangle with the whole clipping geometry sitting inside the rectangle (i.e. bounding box), with values of pixels outside the clipping geometry remain their original values
Clip Raster: export a minimum rectangle with the whole clipping geometry sitting inside the rectangle. Values of pixels outside the clipping geometry will become NULL/NoData
Export Raster with Clipping Geometry
It is demonstrated in at around 2:56 of pt.2 of the walkthrough.
Export Raster with Clipping Geometry will export the raster with the rectangular extent (i.e. bounding box) of the clipping geometry. This function is available with right click the raster layer in the Table of Content, then choose Export Raster -> Set Clipping Geometry.
If your clipping geometry is a rectangle perpendicular (is this the right term?) to the raster grid, the minimum rectangle will be the same as your clipping geometry. However, if the raster grids are diagonal to the raster grid, the story is entirely different.
Clip Raster geoprocessing tool
It is demonstrated in at around 4:15 of pt.2 of the walkthrough.
Clip Raster geoprocessing tool will export the raster with the true extent (i.e. exact shape of the clipping geometry) of the clipping geometry. This function could be found by typing in Clip Raster in the geoprocessing toolbox searcher.
Be sure the Use Input Features for Clipping Geometry is checked to create the desired clip area, as stated in the Clip geoprocessing function manual.
Hillshades!
I have to repeat to myself again I never have a formal class on cartography (except the ESRI MOOC). And I never know how hillshade works. I just searched, added and randomly changed the symbology of the multi-directional hillshade layer in Pro in my last mapping project without knowing how the hell do everything works. I feels like I am brute forcing the symbology to find a gradient and opacity that blends into the map.
Now I know a little bit of it, in terms of WTH are the azimuth and altitude variables. In addition, to create the shadow effect, some kind of blurring of raster with Focal Statistics is required. A shadow that is too crisp (using the term by John Nelson) will look artificial and does not play well with the optical illusion I aim to create.
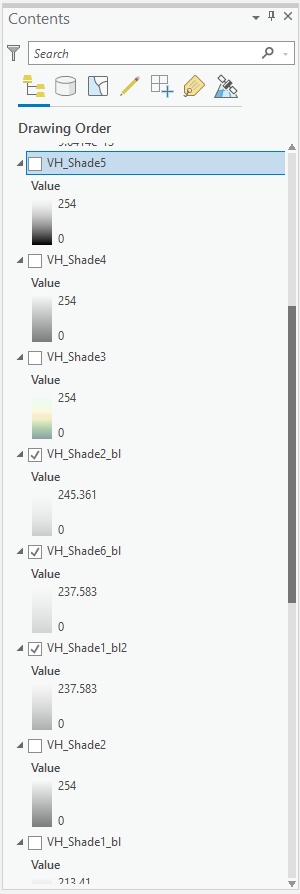
Still, finding the neat parameters for hillshade is a trial-and-error process, especially when the map will have multiple layers of hillshades, each with different:
- azimuth
- altitude
- neighbourhood for blurring
- gradient colour scheme
- transparency
I could hardly imagine the number of possible combinations available. A seasoned cartographer will play through various combinations and quickly identify the best hillshade layers for the end map. A newbie cartographer like me will also play through various combinations for hours, yet still unable to balance between the hue and the opacity of the hillshades…
The How HillShade works article from ESRI now stays in my browser tab until I have time to read it.
Layer Blending
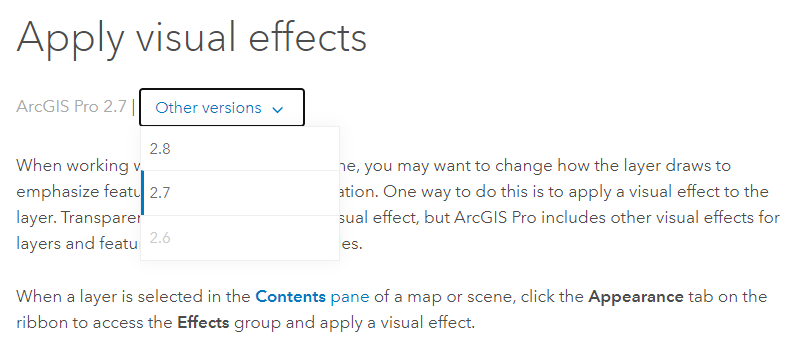
Layer blending is introduced in version 2.7 of Pro, while the version of ArcGIS Pro I originally use in my machine is 2.5. I have a hard time to find where the layer blending ribbon is located when I was following the video, until I realised upgrading Pro is necessary.
Layer blending is a fancy term of applying filters to the raster layers, same as what you will do with the filters in Photoshop.
This part is again more of a trial-and-error process. The Apply visual effects note provides the example output, algorithm and descriptions about each of the available blend modes. Still, for turning the hillshade rasters into lights, the Divergent section is the most relevant one. Hard Light and Soft Light would blend the hillshade rasters into the map.
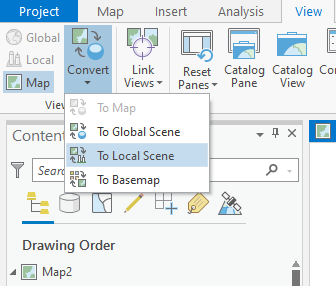
Convert view from Map to Local Scene
In the coda of the tutorial, John Nelson added an extra method of displaying the vintage map in 3D (Wow!). I didn’t realise there exists an one-click function in the View ribbon for you to instantly convert a map view to a scene view. I have been wasting so much time in the Create Local Scene -> Copy layers from Map -> Paste layer to Scene procedure.
I am quite pleased with the 3D View of the topo map also. Apply some kind of blurry effect in the background should make this shot more like taken from a camera.
Conclusion (or not a conclusion)
Most of the time, I consider the first trial of playing new map-making techniques are just a scratch pad to explore the functionalities of the software, as well as finding some functions hidden in nowhere that I never know it exist.

Further Reading
- How HillShade works
- Export or convert raster datasets
- Apply visual effects