June 28, 2021
Add npm to existing ArcGIS JS API web app project
1049 words | 5-min read |
TL;DR
This blog jots down the steps of setting up a development environment of an existing ArcGIS API for Javascript (ArcGIS JS API) project using npm. The development environment is capable for 1. running a web server to view the web app; 2. javascript code linting and 3.
Revisiting the old repo
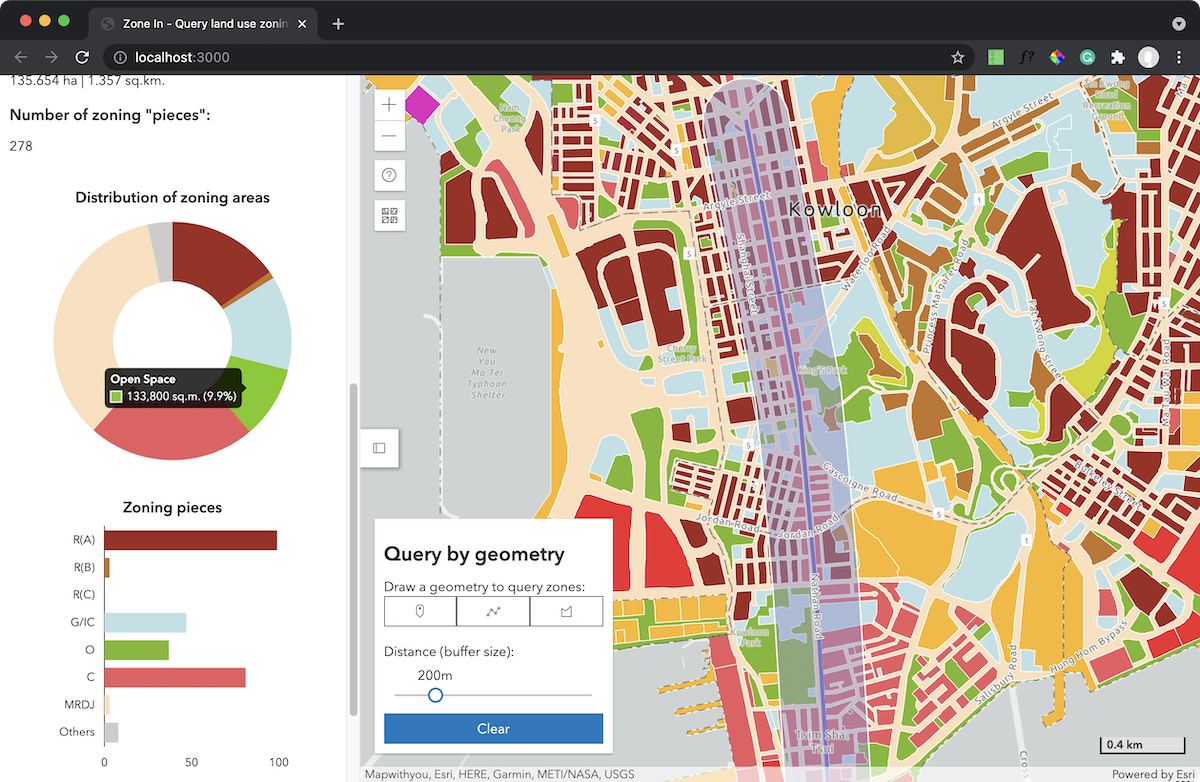
I am revamping my old web app project built with ArcGIS JS API (should a repo without edits for nearly half a year counted as old?). At that time, I have no idea how npm (nor node.js) works. So I test and lint and debug the app manually.
Now I know a little bit about it. I also have some spare time to revamp the project (i.e. confess I was writing a pile of egregious and horrific code). The first thing I want to do is add npm and node.js to the project because of the following reasons:
- npm is the pillar for module packaging for app development, which saves time for future scalability.
- I used
python3 -m http.serverto start a web server and test the app. It would be better stick with JavaScript for the whole project. - It is foreseeable that I will need a full tech stack if I continue on developing this app. The technical debt will just roll larger and larger if I do not implement it now.
The best way to remember the steps is to write them down. So, in case you find this post hard to read, my apologies that this post is more like a note to myself how to set up npm.
I actually walked through the tutorial instructions from the Getting started with web 3D using ArcGIS API for JavaScript manual. This blog is a little bit different that: 1. I am adding npm to an existing project (instead of initialising a new project and 2. I use JavaScript only (instead of typescript).
0. Basic Set up
This assumes the following components are already set up for the project:
- The project is a git repo
- npm and node.js are installed globally in the local machine
- The existing app structure is fully structured, with the great trilogy of
app/*.js,styles/*.cssandindex.html. The structure of my project is like below:(base) Kenneth@Kenneth OZP_buffer_stat % tree . ├── README.md ├── app │ ├── Main.js │ ├── create-chart.js │ └── ui.js ├── index.html └── styles └── main.css 2 directories, 6 files
At the time of writing, I am using npm version 7.13.0 and node v16.2.0.
1. Initialise npm project
Type the following command to set up a npm project:
npm init
npm will then asks you a number of questions like package name, version, description, etc. Fill out the information, or just continuously hit enter to leave it blank. It is possible to edit the details in the future.
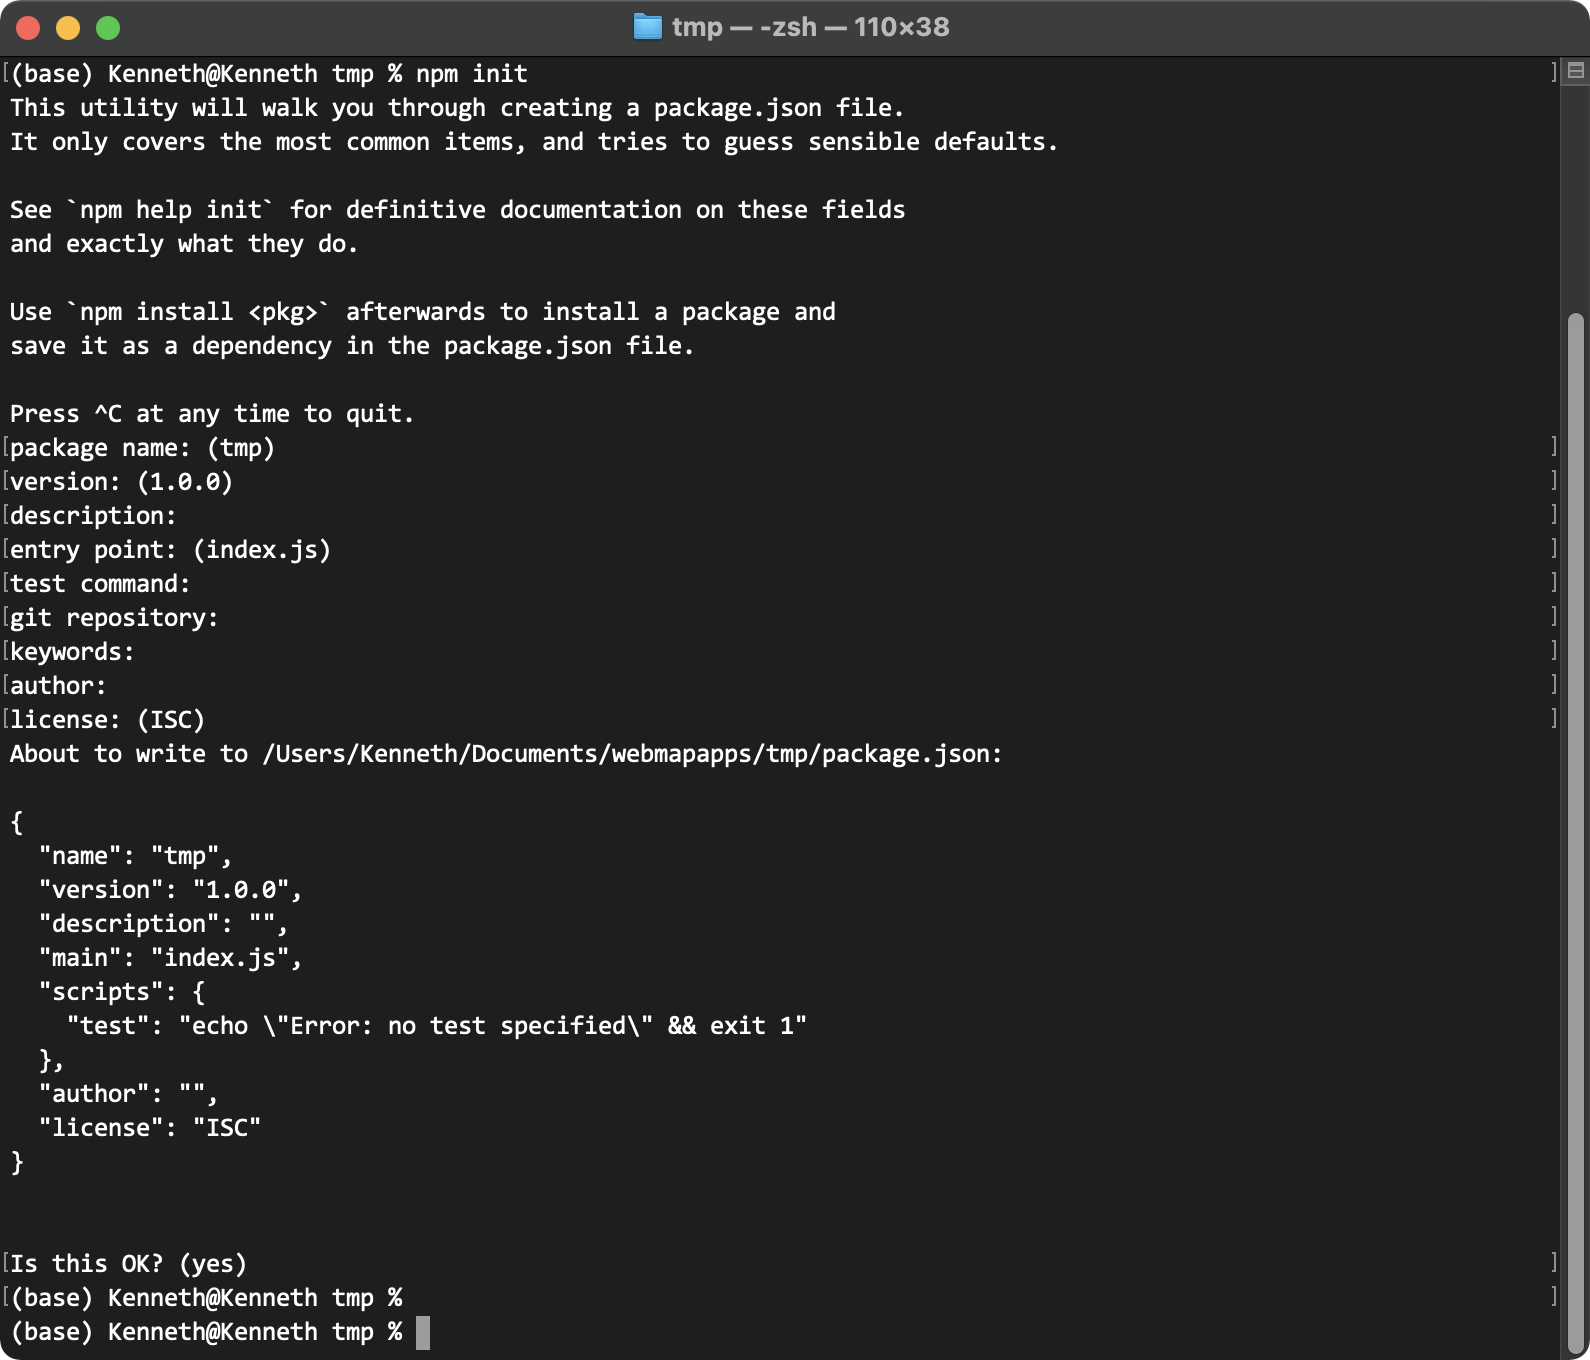
A package.json file should appear in the root directory afterwards.
2. Set up linter
npm install --save-dev eslint
--save-dev marks this package is development purpose dependency. This means this tool is only used for development and does not contain code which will be executed as part of the final code shipped to deployment.
Following the ESLint installation guide, it is necessary to set up a configuration file using:
npx eslint --init
The terminal will then prompts a number of questions asking your preferences of linting preferences. Use the up and down arrow keys to select the answer and hit enter the confirm your choice.
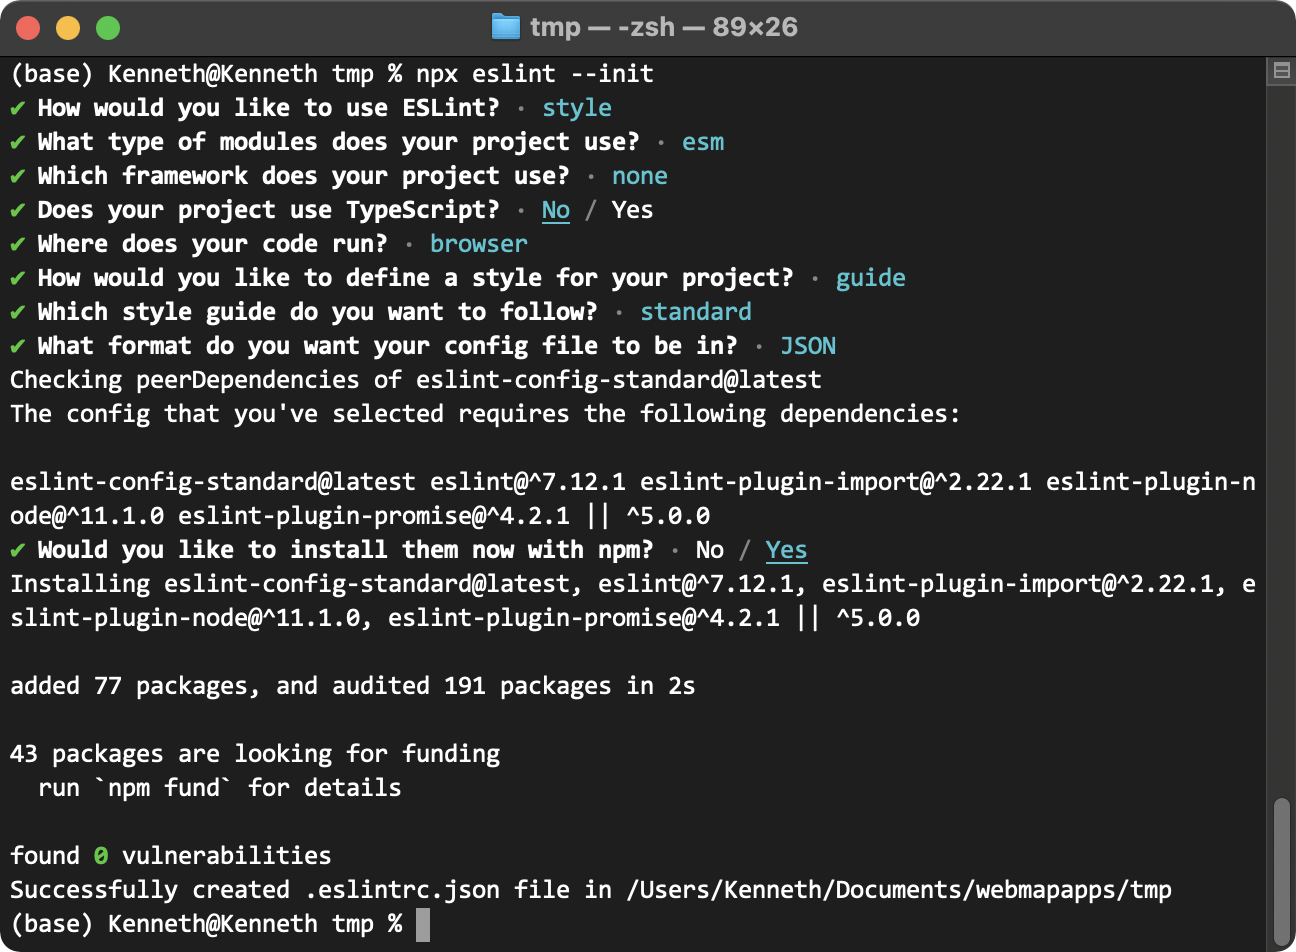
After answering all questions, a .eslintrc.json file will pop out in the root directory. Open it are configure the lint options and rules as suggested from the documentation. Following are my rules. You can directly copy it to replace the existing json in the file.
{
    "env": {
        "browser": true,
        "es2021": true
    },
    "extends": [
        "standard"
    ],
    "parserOptions": {
        "ecmaVersion": 12,
        "sourceType": "module"
    },
    "rules": {
        "no-undef": "off",
        "no-unused-vars": "warn"
    }
}
3. Set up web server package
Install browser-sync to set up a web server. This will also listen for changes and reload the page when you run the package.
npm install --save-dev browser-sync
4. Set up npm scripts
npm scripts are custom built-in scripts and their preset life cycle events as well as arbitrary scripts for development purpose. These can be executed by running npm run <stage> in the terminal.
I need two major functions for development. First, I need to start a local web server to test the web app before deploying it. Second, I need a linter to check my coding style.
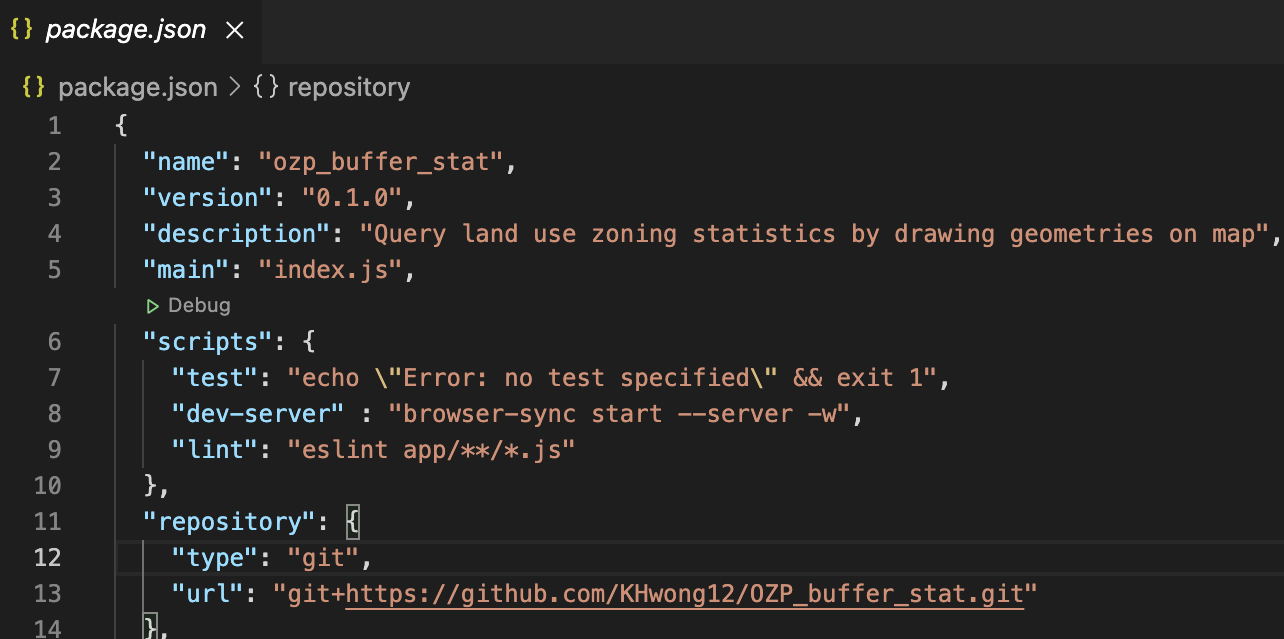
Open the package.json file and change the scripts property to the following:
  "scripts": {
    "test": "echo \"Error: no test specified\" && exit 1",
    "dev-server" : "browser-sync start --server -w",
    "lint": "eslint app/**/*.js"
  },
Start a server and test the app
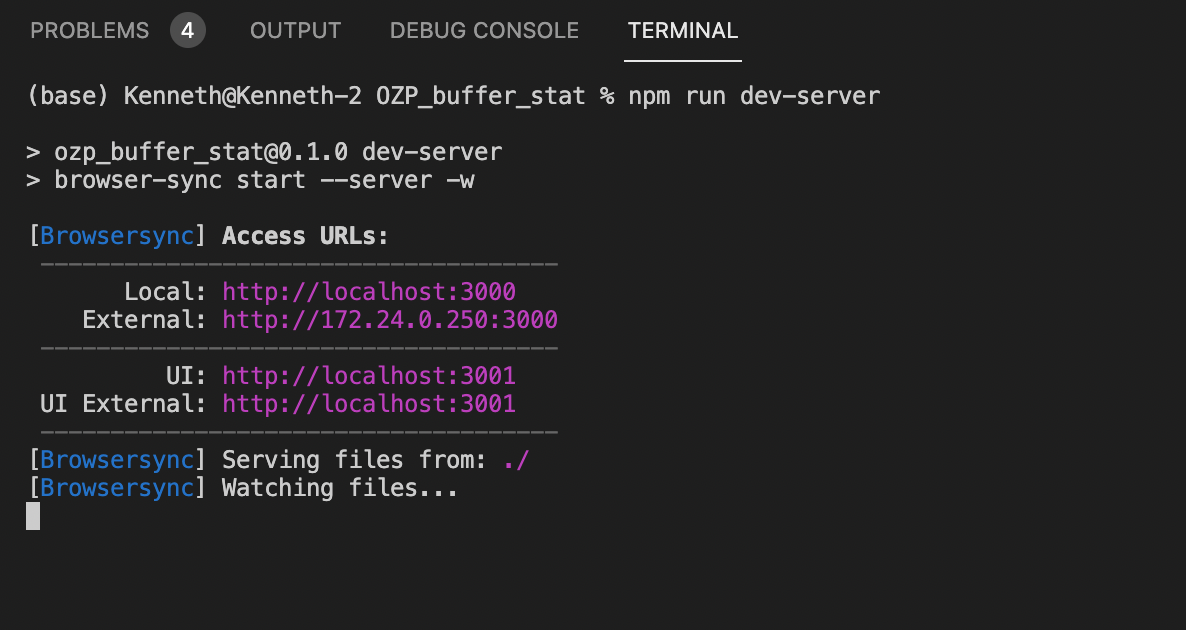
When run npm run dev-server, a web server will automatically run and pop up a new webpage in your browser.
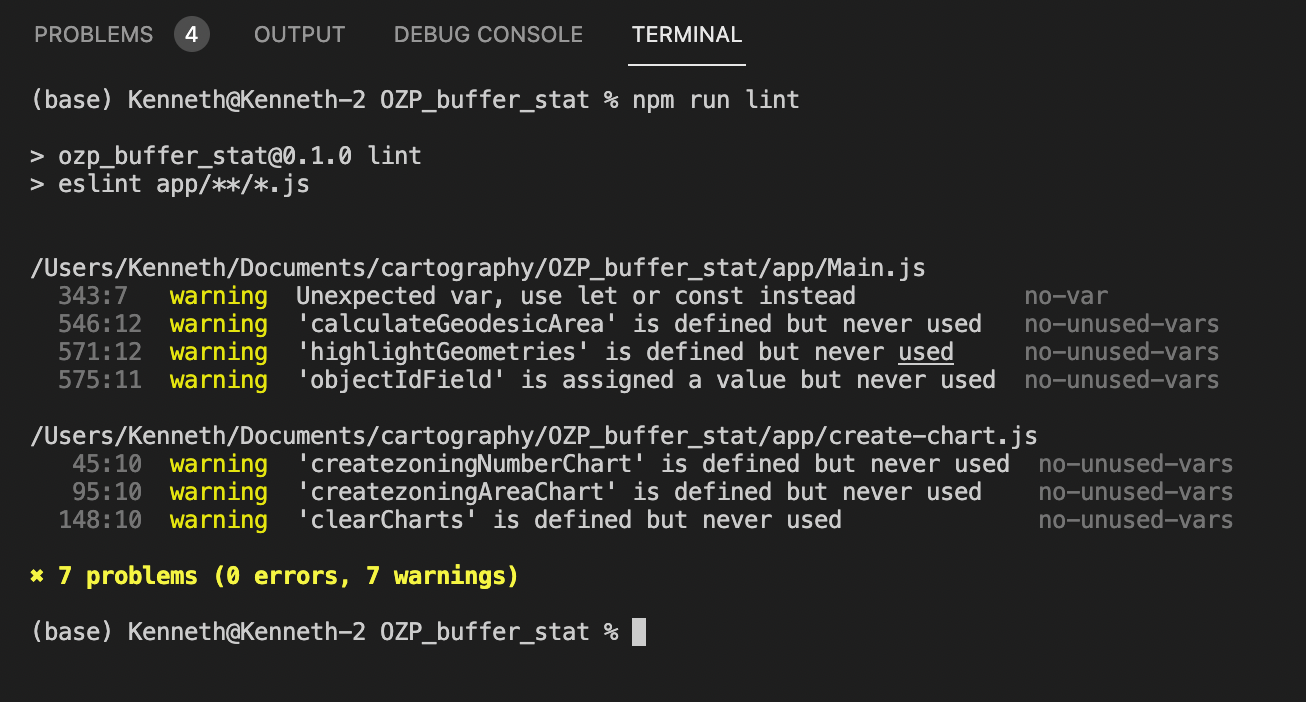
Lint the code
When you run npm run lint in the terminal, it will automatically run the eslint package to check for code formatting problems.
5. Commit all these changes to merge it
The final folder structure will be something like this. See how the node_modules folder is acting a black hole to consume all of the available disk spaces.
(base) Kenneth@Kenneth-2 OZP_buffer_stat % tree -L 2
.
├── README.md
├── app
│   ├── Main.js
│   ├── create-chart.js
│   └── ui.js
├── fig
│   └── overview.png
├── index.html
├── node_modules
│   ├── @babel
│   ├── @eslint
│   ├── @types
│   ├── accepts

...
<trimming the node_modules black hole>
...

│   ├── yargs
│   ├── yargs-parser
│   └── yeast
├── package-lock.json
├── package.json
└── styles
    └── main.css

296 directories, 9 files
Questions
Why installing JavaScript API with npm is not necessary?
It may be perplexing not to install the ArcGIS JS API with npm. Indeed, it is possible to install the API locally for use with JavaScript frameworks using npm install @arcgis/core.
There are different ways to use the js api for your project, as listed from the
- AMD (Asynchronous module definition) modules via ArcGIS CDN
- ES modules via NPM
- ES modules via CDN
My existing project is already using the CDN approach (i.e. adding <script src="https://js.arcgis.com/4.19/"></script> to the html). Therefore, it is no need to use the ES modules.
Further Reading
- Configuring ESLint
- Learn the basic syntax for lint code